


DIY Lithium Battery Rack for Small RV Compartment - Full Build

Full Build of Vertical Rack System plus lithium battery installation. Perfect for an RV, camper or van with limited space. BONUS: (1) Connecting four batteries in parallel with bus bars (2) Cutting and crimping large battery cables (3) Cool BLUE compartment lighting.
2:35 Building Rack System
9:30 Cutting and Crimping Battery Cables
11:20 Parallel Wiring of Batteries with busbar
FOLLOW-UP - LITHIUM vs AGM after 90 Days Boondocking
https://youtu.be/MDdN3HiBf3w
RV SOLAR and BATTERY COMPONENTS (Affiliate Links)
Battleborn LiFePO4 Lithium Batteries: https://www.rvwithtito.com/battleborn
https://www.rvwithtito.com/parts/rv-solar-power
Temperature Switch: https://amzn.to/2r27Y2G
Quick Release Clips: https://amzn.to/2OlSyyn
Door/Cabinet Open Switch: https://amzn.to/37eOS9W (different from mine but should work)
MORE ABOUT THIS EPISODE
I wanted to do something a little different while upgrading my 450Ah AGM battery bank to 400 Ah of Lithium (LiFePO4) batteries. My list of improvements included making the battery terminals more accessible, making more efficient use of the small space, adding thermostatically controlled heating pads and cool LED lighting. Of course, I needed to keep the batteries secure. For that, I built a custom aluminum frame. I also wanted to make use of spare parts and materials I already had on-hand (heating pads, LEDs, switches). I picked up the aluminum and acrylic from Lowes.
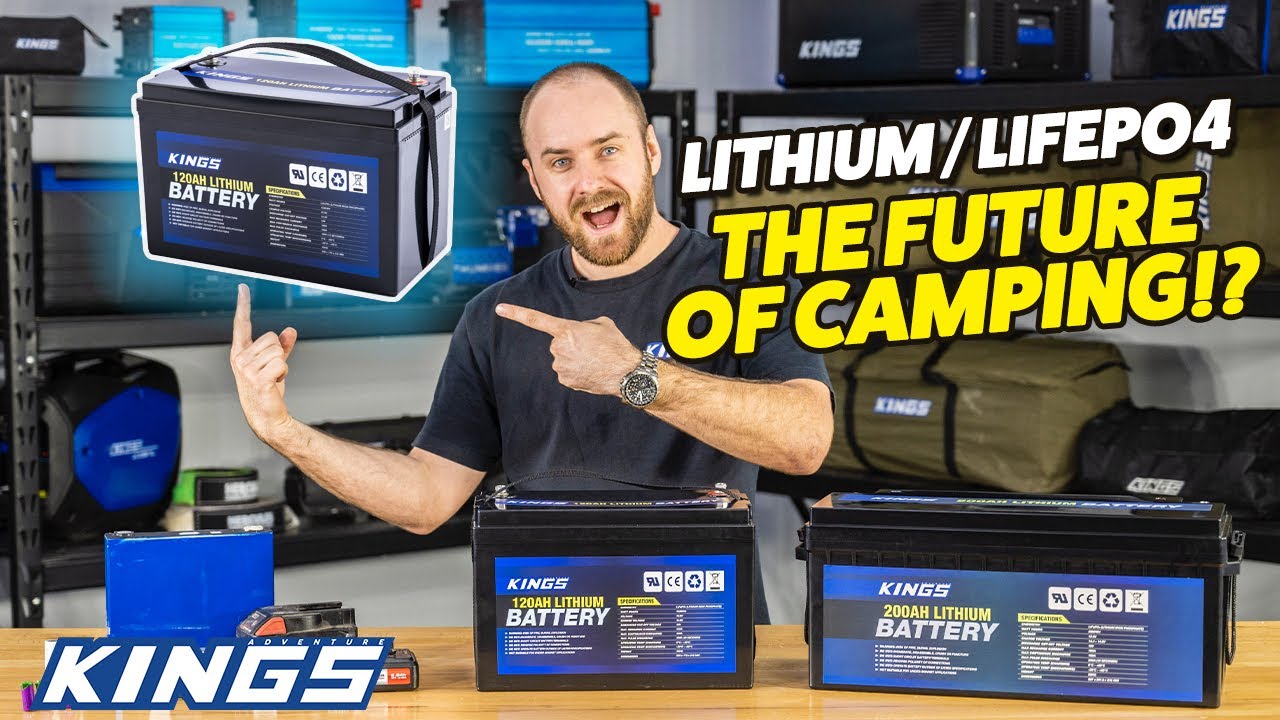
LITHIUM BATTERIES: The lithium batteries I purchased were Battleborn LiFePO4 (Lithium Iron Phosphate) drop-in replacement batteries from Dragonfly Energy. I’ll talk more about why I upgraded from AGMs to Lithium in a later video after I’ve used them for a while.
LITHIUM BATTERIES IN PARALLEL: To get 400 Amp Hours of reserve capacity at 12 volts, I needed to connect the 12 volt batteries in a parallel configuration. I used two 300 amp bus bars mounted on the battery frame with 8 cables of equal length.
All positive battery terminals were connected to one busbar. All negative battery terminals were connected to the other. A cable from the positive battery bus connects the battery bank positive to the RV. A cable from the negative battery bus bar runs to the battery monitoring shunt via the main battery cut off switch.
BATTERY CABLES: Thick #1/0 cable was used for all battery connections. I purchased bulk black and red cable, lugs, and heat shrink then assembled my own cables to the exact lengths I needed.
HEATING PADS and INSULATION: To keep the lithium batteries above freezing, I used heating pads left over from previous projects. I wrapped the rear and bottom with two pads left over from a heated car seat installation. The pads have a high and low setting which is very handy to make adjustments. I wrapped the heating pads in leftover fabric to dissipate the heat, eliminate any hotspots and create a sort of blanket. Between the batteries I used small pipe heating pads stuck to pieces of aluminum to spread out the heat. All four heating pads are powered by an adjustable temperature controlled switch I picked up from Amazon. When heating the whole setup draws only 4 Amps at 12V. Finally, I wrapped the bottom, sides, top and rear with heat shield insulation.
DISCLAIMER
The opinions expressed in our videos are our own or from a contributor. Before taking on any project or making a large purchase, we recommend you do your own research and consult a professional for advice. We are NOT liable for any damage to your RV or injury incurred as a result of following our tips, advice or instructions. We are not RV professionals or certified technicians. We are simply RV owners who work on our own RVs and have a desire to share what we learn with others. Be responsible and know your limits.
AFFILIATE DISCLAIMER
This video may include links to merchants with affilliate programs who pay us a commission on purchases made or actions taken after clicking the link. We are a participant in the Amazon Services LLC Associates Program. As an Amazon Associate we earn from qualifying purchases.
